Friday, July 31, 2009

Corsages + Boutonnieres

Dear Shayne,

Are you sick of seeing my wedding flowers yet? Too bad -- I also made the corsages and boutonnieres, so I'm showing them to you. Right now.

All of the ladies wanted wrist corsages, so I used a sheer white ribbon to tie them on, but I took these photos before I attached the ribbon. It got frayed after a hard night's use, but I preferred the look to elastic, which I originally tried.

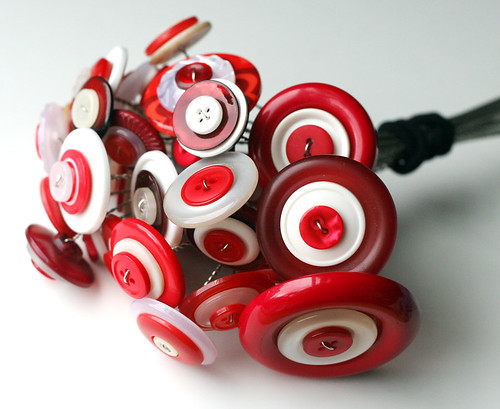
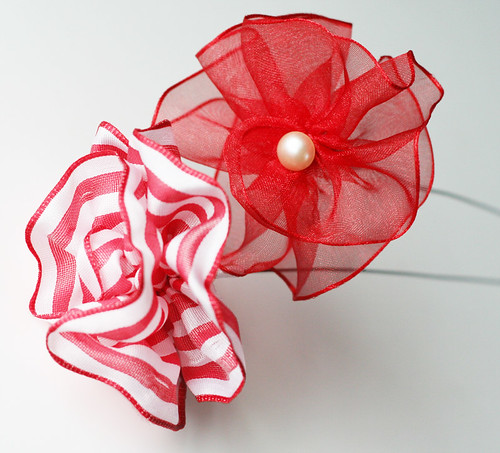
This one was for my grandmother:
Gramma's corsage

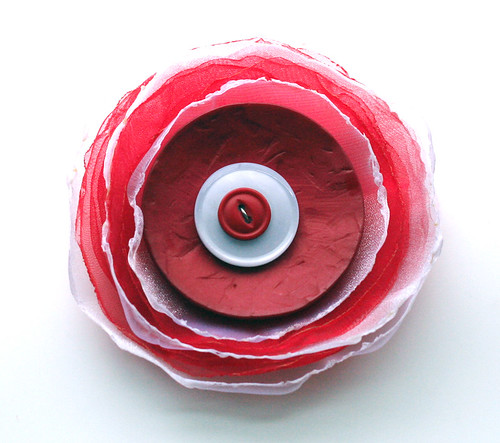
It's hard to tell from this photo, but it's pretty big. Probably 4 inches across. She is a lady with lots of style, so I wanted her to have something really bold. The center is made of buttons -- the large red one is a hand-crafted button that has a lot of texture. The rest of the "petals" are made using the burned organza technique (same as the "poppies" in my bouquet).

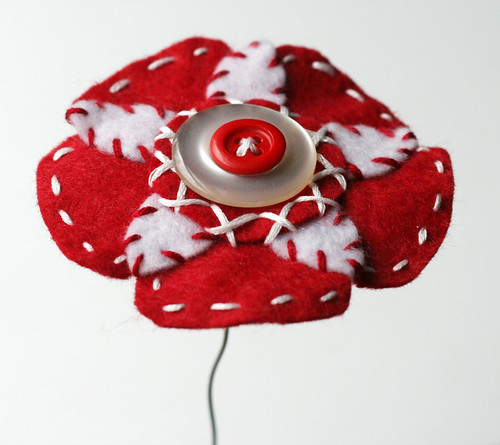
This one was for my mom:
Mom's corsage

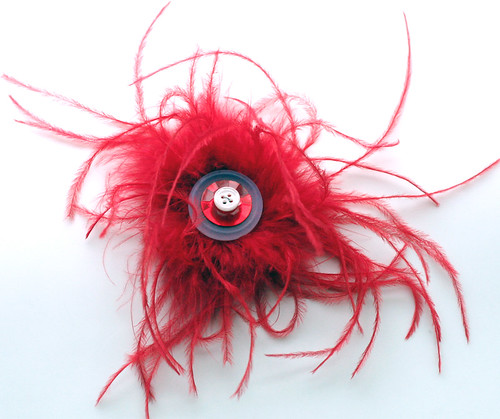
I loved this one. The main part (not counting the flyaway fluff parts) was about 3 inches across. It was very fluffy and festive -- that center red button is very sparkly. Just like my mom!

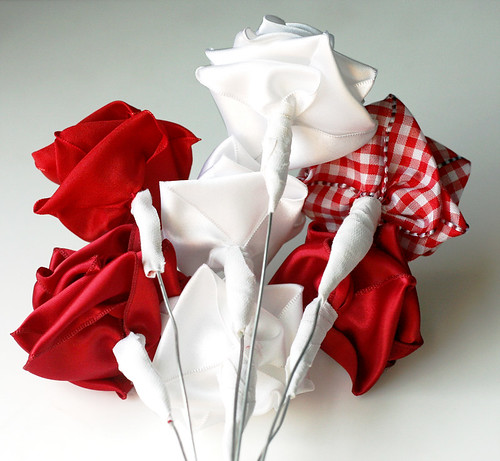
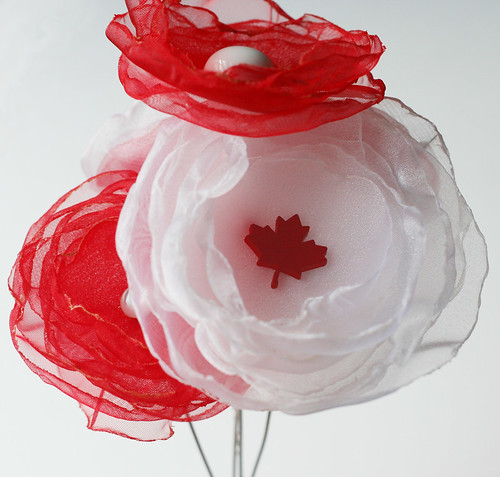
This one was for Bill's mom:
Judy's corsage

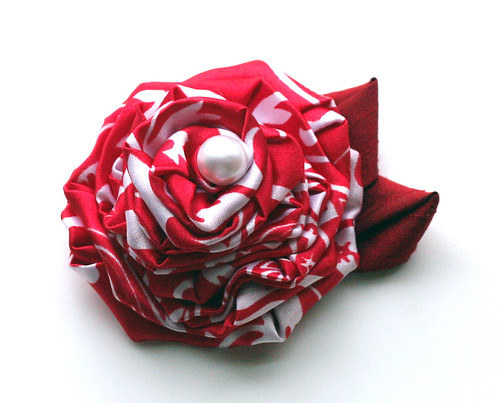
Good lord, did this one take me far too long to make. I used this awesome tutorial (which would make CUTE flowers out of cotton fabric -- gotta try that sometime) from Portobellopixie, but I made the mistake of using a slippery fabric, which was an absolute struggle to wrangle. I think this flower alone ended up taking me 3+ hours to make! Yikes! But I was really happy with it in the end, so I'm glad I stuck with it.

What I really like about these corsages is that the ladies can cut away the ribbon after the wedding, glue a pin to the back, and have a cute broach that they can wear forever. I tried my best to make flowers in styles that I thought each of them would really like. I hope I succeeded.

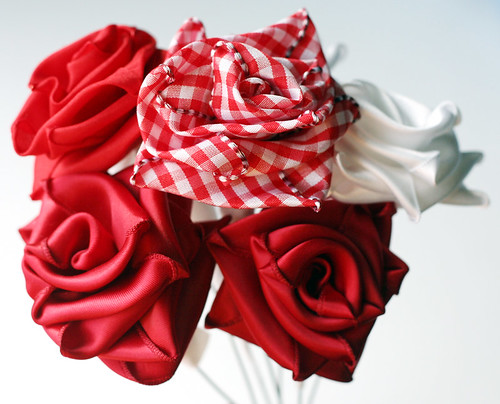
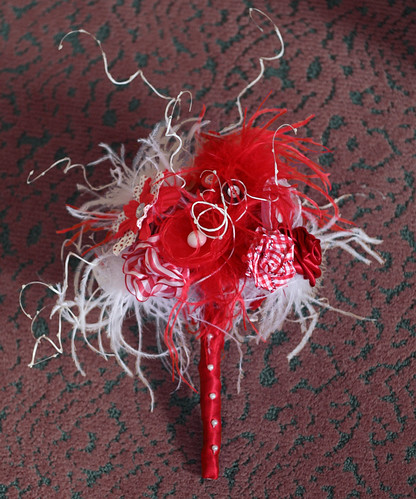
For the boutonnieres, I let Bill pick from all of the flower styles that I had made for the bouquet. He chose the roses:
Boutonnieres

I used hockey tape to tape the bud for these, but then they looked like tampons (Ha!) so I embellished with the striped ribbon -- I just wrapped it around the stem and then left the tail as a sort of "leaf." It ended up giving some extra pizazz, so I'm glad for that "happy accident."

All right. Sick of flowers? Good. I've got more stuff to show you anyway.

love,
kelly

Wednesday, July 29, 2009

My bouquet

Dear Shayne,

Time to show the wedding crafts! I am probably going out of order here, as I should show you our invitations first. But I just have to post my bouquet, because it was my favorite thing I made.

I cannot remember where I originally got the idea to make our flowers, but I had seen this amazing bouquet and these lovely button flowers and also these amazing felt flowers and it got the wheels turning.

For the past year, I have been bookmarking tutorials and making notes about the flowers I would make and then suddenly, it was time to get married!

I made most of the flowers at home and then transported them to Toronto to make the finished bouquet (which, yes, I created at 6am on my wedding day. I'm nuts.) (But you knew that.)

Here are some of the flowers I made...

Button posies:
Buttons
I had fun collecting buttons for the past year for these flowers. Maybe just a little too much fun. But I am really happy with how they turned out. Love them!

Paper flowers:
Paper flowers
These feel a bit like cheaters, because I found those paper flower shapes pre-cut out at Michael's and then I just put them together myself to form flowers (with buttons in the middle, of course!)

Felt flower:
Felt flower
I only ended up making one of these and it went into my Best Woman's bouquet. (Hi, Jenny!) It doesn't look great here, but it looked good with the rest of them. I don't have a photo of her bouquet -- I hope the photographer got one.

Looking back, I wish I had made more felt flowers. They were the most time-consuming and I just ran out of that. Doesn't mean I can't make more now, though!

Ribbon roses:
Ribbon roses
A time-honored classic, but I especially love that gingham one. I used this tutorial, as I thought it made for especially beautiful roses.

Since we got married at the Hockey Hall of Fame (Yes! I held the Stanley Cup on my wedding day!) I used hockey tape to tape the buds to the stems. Heh.
Ribbon roses: backs

Ruffle-y:
Ruffle flowers
I actually made several more of these the morning of the wedding, as they were some of the easiest to make and they made good filler. I used wired ribbon and just pulled on the wire along one side to make a ruffle. Then I wrapped them around a stem with a button on the end and voila! Flower!

Poppy-inspired:
"Poppies." (sort of.)
I cut circles from organza and then I burned the edges. Finished them off with a button in the middle.

I especially like this maple leaf one:
Oh, Canada
(Go, Canada!)

Puff balls (AKA "Kaesea's favorite"):
Fluffy bits
I bought a couple of short lengths of maribou/ostrich feather trim at Joann's, cut it into short pieces, and then sewed each piece into an "O" shape. I then bent a piece of wire around the O and pinched it with pliers. Worked great and added much-needed body to the bouquet.

As an added bonus, Kaesea thinks it's the Best. Cat toy. Ever. (If you'd like to see a video of him playing with it, check out his blog here.)

I used this fantastic twiggy thing that I got in a swap with the ever-so-talented Christine of the blog Little Chrince -- I made her some 1" polka-dotty buttons and she sent me this awesomeness:
Fantastic bouquet base

And when I put it all together, I had an amazing bouquet!
The finished bouquet
Unfortunately, the only decent photo I have of it is with our hotel room carpet in the background. But I still think it looks pretty great.

I also made the the boutonnieres and the corsages. But this is now the longest post in history, so I will save those for another day.

love,
kelly

Monday, July 27, 2009

Crafty wedding

Dear Shayne,

As you know, Bill and I got married just a little over a week ago. (Yay!) I have been crafting like a madwoman for months, but have not posted much here about it. Partially because I have been too busy crafting, partially because Kaesea has taken up so much of our time, and partially because I did not want to spoil the surprise for our guests. (Like you!)

So I will be having lots of posts coming up here soon detailing various wedding crafts -- hope you're ready for it!

I made 3 mailings for the wedding:
- Save the Dates (which I already posted about here.)
- Invitations (including cute labels and RSVPs, but I did not make the envelopes.) (Shocking!)
- Everyone attending the wedding was sent a map of Toronto and an invite to our pre-wedding Happy Hour (I did make the envelopes for that.)

And this is stuff that I made for the wedding and reception that I am now realizing I have few or no photos of (!!!) I am hoping our photographer got some... grr!
- Fabric table toppers (Sewn at an awesome little studio in Toronto. Can't wait to tell you about that place!)
- Candle holders for the reception using hockey pucks (my knitting crew came together to knit the candle cozies for me, but, sadly, one caught on fire and they had to be removed. How sucky is that? Answer: Totally.)
- All of the flowers (2 bouquets, 2 boutonnieres, and 3 corsages. This was my favorite thing I made -- I hope our photographer got plenty of photos!)
- 1" buttons for the reception (I took zero photos of these. Way to go, Kel.)

I think that was it, although I am now wondering if there was there something else I'm already forgetting? I'm sure I'll remember at some point. And hopefully I'll have a photo of it.

Sooo... I promise to post stories (and at least some photos) in the next few days as I come down from our honeymoon awesomeness. In the meantime, I will tide you over with a photo I took as I was in the midst of a Crafty Storm in our hotel room in Toronto:

I wonder what the heck the housekeeping staff thought!

love,
kelly

Thursday, July 02, 2009

London crafty

Dear Shayne,

On top of planning our wedding (only 16 days!) and caring for our sick kitty, I have also been traveling quite a bit this year (hence the light posting in these parts).

One place I went was to London. I didn't have much time there, but I just had to go to Liberty because their fabrics are drool-worthy. The designs are lovely and the cotton just feels like a dream.

(Edited to add this photo of Liberty that I just realized I took with my small camera...)
Liberty of London

Plus, they were having a big sale when I went. What luck! So, I bought some fabric...

I couldn't resist this one, since our wedding colors are red and white:
Liberty fabric

I was so happy to find this one, because it can be difficult to find good greyscale cottons:
Liberty fabric

The flowers on this one are a larger scale than the others (and do you think I could have pressed this fabric before taking a photo of it? Sheesh.)
Liberty fabric

And these last two are the same print, in different colors. I could not decide which one to get, so I bought both. Heh.
Liberty fabric

Liberty fabric

I thought I was done there, but then I found these amazing rolls of gorgeous wool and I just had to have them:
Wool felt from Liberty

It was difficult to get out of there with just these items. There were so many other amazing crafty things there -- lovely notions, ribbons, buttons, books, etc. If you are in London, you must go to Liberty. It's a bit of a splurge, I will admit, but it's Liberty! It's London!

love,
kelly

Wednesday, July 01, 2009

Shayne, you rock.

Dear Shayne,

You ROCK.

While we were on our crafty tour of San Francisco, I fell in love with a beautiful leather coin purse at Rare Device. I couldn't stop touching it and oohing and ahing. The craftsmanship is amazing and it feels fantastic to hold. I didn't buy it because I could not justify the purchase right now.

But you bought it for me! Getting this present in the mail was such a huge ray of sunshine, which is something I really needed. Thank you, thank you, thank you!
Beautiful leather coin purse

My photos do not do this item justice. It fits perfectly in the palm of my hand and the leather feels amazing.
Beautiful leather coin purse, side view

The cut-out is made so beautifully that it is seamless when snapped closed.
Beautiful leather coin purse, open

The designer is Paulette Rollo. I poked around that site and there are many, many other beautiful things to see there. But I think I got the best one!

Thank you again, Shayne.

love,
kelly